Showing posts with label animals. Show all posts

Wednesday, January 27, 2016

Koi Fish Sculptures: Watch the Video Tutorial!

So it's a year of firsts, and I've tried my hand at making a video tutorial. Can I just say it is sooo much more difficult than it looks, but I hope to find it easier to accomplish as I continue. I also jumped into learning iMovie to edit things and make them fancy. I came up with this lesson for using Model Magic to create Koi Fish Sculptures last summer during my stint as a summer workshop teacher for my school district. 


The summer workshops for me are a great place to develop a lesson, to see which age groups it works best for, figure out what tools work best or what materials will be needed, how long the lesson may take etc. Not to mention, will the kids enjoy it? Will they all attain a level of satisfaction and success? Can early finishers assist those who need help, or who may have missed a class? These things are more important to me than the writing of the lesson plan. I know it's important, but it's a heck of a lot easier to explain in theory, when you have also accomplished the putting it into practice.  

This was also a lesson which helped me round out a ceramics and 3D workshop. The classes ran for 5 weeks, and towards the end, you just can't begin a ceramics project with no time left for drying, cycles in the kiln etc. Model Magic was a great option for the kids, and I am proud to say this lesson is all mine. I love this blogging community, and I love being inspired by all of your hard work! I am thankful to have the technology to research your successes and failures, and so happy to share this one with you.
 
I hope you get a chance to take a look. Enjoy!


EXTRA TIPS AND TRICKS: 

I’m not fond of using Model Magic in the hotter months, unless the art room is air conditioned. When it is hot, the material becomes soft too quickly.

A clean table top work surface is best, and reminders to students to pick up their projects now and then while working will prevent their projects from sticking. 

If you're creating this project in the classroom, I would plan for one class to introduce the lesson, a class to form the body (closing up projects in ziploc bags will keep them fresh for next time), and one to add colors and final details.

For drying time, I place projects on a layer of plastic wrap, let dry for a day or so, and then turn upside down or on it’s side for the last area to also dry out. A hard, stale marshmallow is kind of what you are looking for when it is completely dry.

If a piece was not properly attached, and falls off, I just hit it with a little bit of craft glue and it repairs nicely.

I attempted to give a finished piece a layer of Mod Podge to glaze it, and it was successful for me. Unfortunately, the little bit of extra time the kids took to paint a layer of Mod Podge over their projects caused the Model Magic to release it's color and bleed into the Mod Podge. Now Crayola does sell a glaze specifically for this purpose, but not in amounts for the classroom, so I haven't given it a try.

This subject matter lends itself to cross-curricular learning! Think anatomy, life cycle, or environment of fish, Asian art and culture, and so on. Not to mention, I used these sculptures for a collaborative lesson and display, which I will share soon! Make sure to check in and see it. Cheers!

Wednesday, May 20, 2015

Animal Drawings Inspired by Laurel Burch

5th grade students and I recently studied the work of American artist Laurel Burch. 
Her stylized animals and use of pattern, metallic accents and outlines are always a winner with kids! 


Although I don't have a completely choice-based art curriculum, I find that there is usually room for lots of choices within a lesson. For instance, there was a choice of background paper color. We had just created a project on black construction paper, so I gave a choice of burgundy, dark blue, or brown. These colors were still dark enough for colors to pop, but gave each piece a bit of personality.  


Students also chose whether to use a starter template of a few different animal designs inspired by Burch's artwork, or to draw an original animal idea. I also gave them the choice between using construction paper crayons or colored pencil. 
(The one rule here was not to combine the two media. Although they both work well, when used together, the crayon can make the pencil seem dull.)


It seems that freedom of choice was a hit! When it came time to add metallic outlines and accents with gold sharpie, many students asked for a choice in color. I only had gold in my inventory, but told the students that they were helping out my students next year, because I would be mindful of adding other metallic colors to my supplies. They were happy that their requests were taken seriously, and that they would influence a change in the lesson in the future. Enjoy!

Friday, December 14, 2012

Best Artists in the Ocean: Animated!

Lovely things happen when you are part of a great community of art educators. I recently received an email from Ian Sands. His blog Art of Apex High School is also up for the 2012 Art Ed Blog of the Year at The Art of Education.  Ian asked if his students could use the squid paintings my students recently created after reading 'I'm the Best Artist in the Ocean!' by Kevin Sherry as inspiration for an animation project.
I was so excited that he contacted me and immediately agreed. What a great way for older and younger students to collaborate, utilize technology, and just have fun making art! Not to mention that we are in different parts of the country. Now it feels like we are sharing the same virtual classroom! Thanks Ian, to you and your students. It is just the coolest thing ever to have someone animate your art! My students are all smiles.


There's still time to vote for our blogs at The Art of Ed! 
Midnight tonight is the deadline. Good luck once again everyone! 
I'm off to find out about How to Milk a Dinocow!

Tuesday, November 13, 2012

Best Artists in the Ocean Paintings

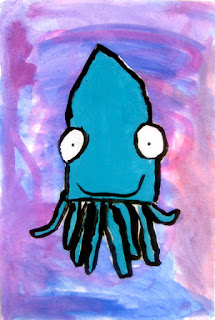
As I continue the unit on literacy in the art room, our young artists read the book 'I'm the Best Artist in the Ocean!' by Kevin Sherry, and learned about squid, their tentacles and their ability to squirt ink.

We then created an ocean background using cake tempera and large wash brushes. Next we made a directed line drawing of our artist squids. The pencil drawing was painted with liquid tempera, and then cut out and glued to the background painting. Options for our paintings were to include an artist's cap and/or mustache to the squid character. Younger artists painted solid black lines for the tentacles and older artists created outlines of black filled in when painting the entire body of the squid. I was inspired by fellow bloggers  Dali's Moustache and by This Little Class of Mine among others. I hope you enjoy our "Messterpieces!"


Wednesday, July 25, 2012

Giraffe Wire Sculptures

Inspired by a lesson in My Art Book: Animals, and artist Andy Scott, students created these giraffe sculptures using Twisteez colored wire (one of my favorite products at the NAEA Convention this past March.) First they chose a color for their cardboard bases and painted them with acrylic paint. They then learned to make a basic armature, plotting out the anatomy of their giraffes. Starting with the legs, additional wires were added to flesh out and strengthen their sculptures. Photographs of giraffes were available for reference. 

I really enjoyed watching these sculptures come to life!  I also loved seeing how each student made their creation unique from others by choices in color, placement, and all of their hard work wrapping, attaching and bending the wires. It was also a great lesson for balance. The legs of the sculptures had to be strong enough to support the rest of the body. If someone started building the head, they would soon realize that they had to stop to focus on building up the lower areas. Then they could return to the top of the sculpture. Enjoy!


Thursday, May 10, 2012

Animal Engravings

As part of our class based on My Art Book: Animals, the children and I learned about Albrecht Durer, the famous painter and printmaker from Germany. His famous Rhinoceros print is featured in the book, and is the basis for an engraving on heavy foil. We thought about what animals might have interesting textures to engrave and our images varied between tortoises, rhinos, and lizards.

We used animal photography as reference and then each student did a preliminary sketch on tracing paper. The metal plates were taped down onto a magazine for a soft engraving surface, and the tracing paper drawing was taped and hinged over the plate. After tracing the sketch onto the plate, the tracing paper was removed and lots of textures and patterns were added freehand to the engraving.

A layer of India ink was applied to the metal plate using a sponge brush and set to dry. Then we burnished the plates with steel wool, to shine up the surface and to enhance all of the line work on the plates. You can choose to skip this step if you like the metal surface as is. Another suggestion from the book was to ink around the animal and use the inked background as a scratch board.


When observing a colleague of mine teaching a similar lesson, she punched holes and mounted her students' projects using office fasteners. I thought this was a brilliant idea to make the pieces look more finished, so I had to steal her genius!

Thursday, May 3, 2012

My Art Book: Animals Winners

Thanks to everyone who entered the My Art Book: Animals give-away. I loved reading all of the comments about your favorite animals! My three lucky winners have been notified and a copy will be mailed out to you soon. Congratulations to Marcia, Pat and Katie! I'll be posting some of my experiences with the lessons in this book soon.

Sunday, April 15, 2012

My Art Book: Animals Giveaway

Toward the end of last year I was approached by DK Publishing to contribute to an upcoming book of children's art projects with animal themes. I love all of the DK titles, and find them especially wonderful visual learning tools for children and families. Needless to say, I was thrilled to be a part of it, and was honored to write the foreword for the upcoming release: My Art Book: Animals.
 

To pay it forward I am giving away a copy of My Art Book: Animals to three of my followers! Please leave a comment on this post letting me know what your favorite animal is and why. And please make sure I have a way to reach you via email. I will also be posting my experiences with some of the projects from the book soon.

The 3 winners will be chosen on April 25th, 2012 by random drawing, and announced in a future post. Good luck on winning this title to add to your library!

Friday, March 9, 2012

Chinese New Year Lions

The kids and I have been working on a great project for Chinese New Year. I designed a puppet that takes inspiration from Chinese New Year Lions. My family and I visit Chinatown in nearby NYC for the Chinese New Year celebrations and have followed the lions through the streets as they visit shops to collect small red envelopes and to give the shopkeepers their blessing.


It began with the idea of cutting a plastic plate in half and hinging it to make the mouth of the lion and it developed from there. Here we are creating the mouths and feet.


We created the bodies of the puppets with Smart-Fab who coincidentally were another exhibitor at convention. A little while back, they sent me some fabric to try and blog about. This was the first project I used it for. It's easy to cut, and we used tacky glue and hot glue guns to construct our projects. The Smart Fab stood up to it all. Thanks to the company for giving me an opportunity to try it out!


 And here are some of our final creations. It was hard to keep everyone still to take pictures! As you can see, I had a large age range and everyone was happy with this project! When I have older kids and younger kids together, the older ones always love to help the younger ones. It is a nice place to be. Not to mention that I even get to be in a picture!


Can you see all of the parts to construct these lions? A plastic plate, a plastic bowl, egg carton cups, paper tubes, and Smart-Fab. We used tissue squares and Mod Podge to cover the head, felt for the ears and tails, yarn, gems, pom poms, wiggle eyes, and jingle bells. I love this job! Enjoy.